01
Required
Find on Amazon Raspberry Pi Zero 2 W with headers
Choose a Zero 2 W with the 40-pin header already soldered, or add a correctly soldered header before stacking the HAT. A full-size Pi 5 is not required for this cloud version.
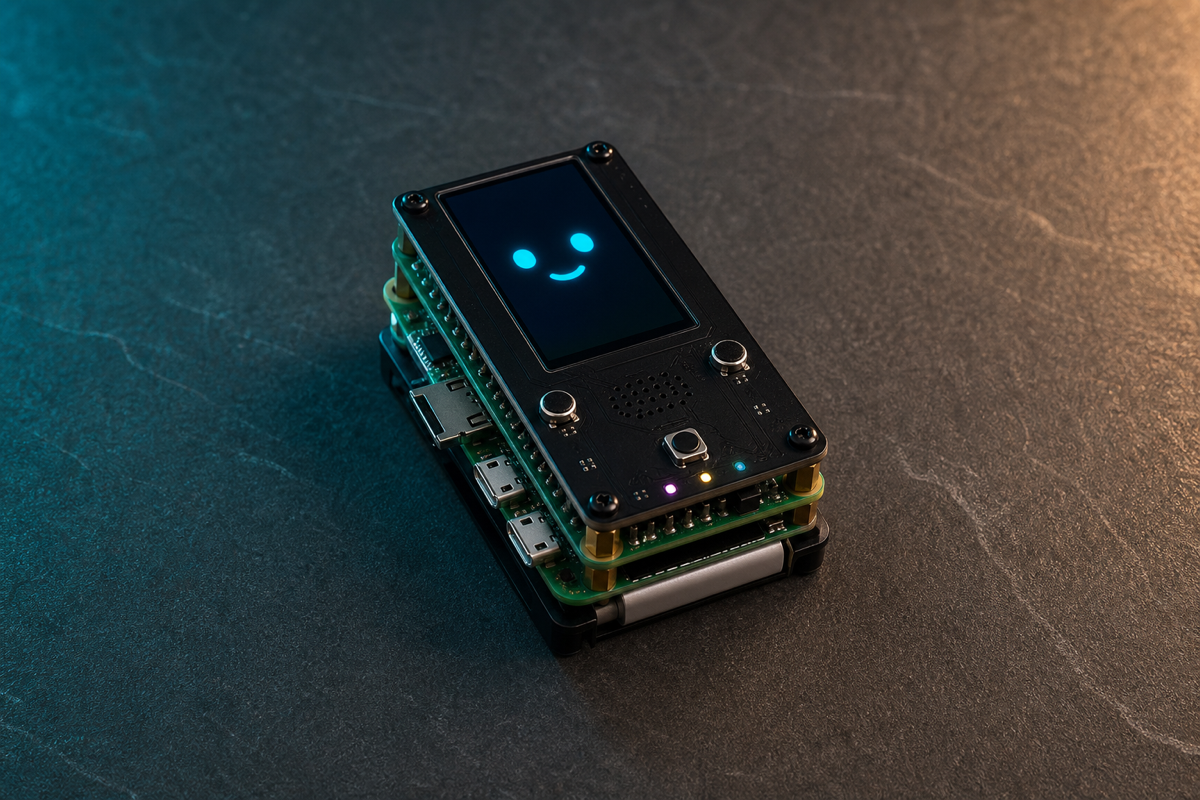
A pocket-sized push-to-talk chatbot that captures speech, sends it to a configured cloud AI service and plays the spoken answer through the Whisplay HAT.
Original demonstration
The tutorial covers hardware assembly, Raspberry Pi OS, SSH, Whisplay drivers, chatbot configuration, volume adjustment, automatic startup and battery status in a compact Pi Zero 2 W stack.
Video: This Tiny Raspberry Pi Chatbot Actually Talks! 🤖 | Build an AI Chatbot with Whisplay HAT & PiSugar by Jdaie Lin. LocalClaw does not rehost or modify the video.
Cloud boundary
This build sends audio and prompts to configured cloud services. Normal conversations require working Wi-Fi, a valid API key and available account credit; API usage can incur charges. It is not the offline Raspberry Pi 5 build listed separately in this directory.
Verification boundary: LocalClaw checked the hardware and install path against the original video, the current PiSugar repository, Whisplay driver and official PiSugar documentation. The commands below pin the reviewed source revisions and keep credentials out of logs. Reviewed runtime commit: ee7301b2f769. LocalClaw has source-reviewed this guide but has not physically reproduced this build.
Parts list
These buttons open regional Amazon searches through LocalClaw. Confirm the exact specifications on the seller page before ordering.
Choose a Zero 2 W with the 40-pin header already soldered, or add a correctly soldered header before stacking the HAT. A full-size Pi 5 is not required for this cloud version.
This board combines the portrait LCD, microphones, speaker, button and status LEDs used by the tutorial. Confirm the package includes its speaker and mounting hardware.
Use the compact 1200 mAh PiSugar 3 documented for the Zero 2 W build, not the larger PiSugar 3 Plus intended for Raspberry Pi 5.
The official prebuilt path requires at least 16 GB. A reputable 32 GB A2 card leaves room for Raspberry Pi OS, dependencies, builds and logs.
Use a regulated adapter and a reliable cable while installing. Confirm the connector and charging instructions against the PiSugar 3 documentation before powering the assembled stack.
Affiliate disclosure: As an Amazon Associate, LocalClaw earns from qualifying purchases. The original creators do not endorse these purchasing links, and prices or availability may change.
Step-by-step
Use the original video as the visual assembly reference. This independent LocalClaw path follows the current official repository, adds credential protection and separates hardware, cloud and startup checks.
Use Raspberry Pi Imager to write current 64-bit Raspberry Pi OS. Set the hostname, username, password, Wi-Fi and SSH before the first boot.
With all power disconnected, mount the PiSugar 3 beneath the Raspberry Pi Zero 2 W and align the Whisplay HAT over the complete 40-pin header.
Start on stable external power, connect to the configured hostname and update Raspberry Pi OS before adding the hardware driver.
ssh your-user@your-hostname.local
sudo apt update
sudo apt full-upgrade -yClone the official driver, pin the revision reviewed by LocalClaw, install it and reboot. Run the supplied hardware example before installing the chatbot.
cd ~
git clone https://github.com/PiSugar/Whisplay.git --depth 1
cd Whisplay
git checkout a695240f866257033414697d47c3aa4c5f9b749c
sudo bash install_driver.sh
sudo reboot
Note: After reboot, use the official example test to confirm the display, button, LEDs, microphone and speaker. Do not debug the cloud API until the hardware passes.
Clone the PiSugar application, pin the reviewed revision, install its dependencies and build the interface.
cd ~
git clone https://github.com/PiSugar/whisplay-ai-chatbot.git
cd whisplay-ai-chatbot
git checkout ee7301b2f7693111ee016f81c48a75d3387a7326
bash install_dependencies.sh
source ~/.bashrc
bash build.shRun the interactive wizard and select OpenAI for ASR, LLM and TTS. Enter the API key only on the Raspberry Pi, restrict the .env file and verify provider names without printing the secret.
cd ~/whisplay-ai-chatbot
whisplay configure
chmod 600 .env
grep -E '^(ASR_SERVER|LLM_SERVER|TTS_SERVER)=' .env
Note: The reviewed source currently defaults to hosted models when explicit overrides are absent. Provider availability and pricing can change, so confirm the current OpenAI documentation before choosing overrides.
Start the chatbot in the foreground, press the Whisplay button, speak a short request and wait for the displayed and spoken answer.
cd ~/whisplay-ai-chatbot
bash run_chatbot.shSay hello in one short sentence.Give me one idea for a weekend project.Note: A successful answer proves hardware, network and API access together. If volume is low, open alsamixer and adjust the Whisplay output before changing AI settings.
Install the official PiSugar power manager, select the PiSugar 3 model when prompted and verify that its service can read the battery.
cd ~
wget -O pisugar-power-manager.sh https://cdn.pisugar.com/release/pisugar-power-manager.sh
bash pisugar-power-manager.sh -c release
systemctl status pisugar-server --no-pager
Note: The manager exposes a local web interface on port 8421. Change default credentials and do not expose it directly to the public internet.
Stop the foreground process, run the official startup helper and inspect the service and log after reboot.
cd ~/whisplay-ai-chatbot
bash startup.sh
systemctl status chatbot --no-pager
tail -n 100 chatbot.log
Expected performance
Cloud speech recognition, language generation and speech synthesis from a pocket-sized Raspberry Pi interface. The Zero 2 W handles the display, button and audio stream while remote services do the heavy inference. Response time therefore depends on Wi-Fi, API availability and the selected models.
Troubleshooting
Prove the screen, microphones and speaker before debugging the API. Then test credentials and network access before enabling the boot service.
Return to the Whisplay driver example. Recheck 40-pin alignment, driver installation and ALSA devices before touching API configuration.
Confirm the key belongs to the intended API project, billing or credits are available and the account can access the configured services. Replace a leaked key immediately; never print it for debugging.
Verify Wi-Fi and DNS from the Pi, then inspect chatbot.log for the provider stage that failed. A browser subscription does not automatically include API credit.
Test close to the Wi-Fi access point, reduce competing traffic and use a short prompt. Cloud response time includes upload, speech recognition, generation, synthesis and download.
Use alsamixer to adjust the Whisplay output and rerun the hardware audio test. Avoid maximum gain if it clips; this is independent of the cloud model.
Do not run two managers for the same hardware. Use the repository daemon registration path, or deliberately stop and disable the daemon before choosing the legacy chatbot.service mode.
Sources and credit
Jdaie Lin published the original Pi Zero 2 W tutorial on the PiSugar Studio channel. PiSugar maintains the Whisplay driver, chatbot application and battery software used by the build. LocalClaw's page is independent and does not imply endorsement by any cited creator, model author or tool maintainer.
License note: The Whisplay chatbot is GPL-3.0 and the Whisplay hardware driver identifies Apache-2.0 licensing. OpenAI is a Hosted API service governed separately by provider terms and billing. LocalClaw links to the original projects and does not redistribute their code, credentials, video or model outputs.
Questions
No in the documented configuration. The Pi handles the interface and audio, but speech recognition, the language model and speech synthesis use cloud APIs. Internet access, a valid key and available API credit are required for normal conversations.
This project is smaller and uses a PiSugar 3 1200 mAh battery, but sends AI work to the cloud. The separate Pi 5 guide downloads Whisper, Qwen3 and Piper so the demonstrated conversation loop can run locally after setup.
No. ChatGPT subscriptions and API billing are separate. Create an API project, review current pricing and set spending limits before using the device.
Yes. PiSugar publishes a basic image for a Pi Zero 2 W, Whisplay HAT, PiSugar 3 and 16 GB or larger card. Check the release notes, update it, replace placeholder credentials and test each hardware function after flashing.
The official documentation identifies the capacity but this guide does not promise a runtime. Screen brightness, speaker volume, Wi-Fi activity, CPU load, battery age and power settings all affect it.
No. Jdaie Lin demonstrated the completed device. LocalClaw verified the tutorial metadata, hardware list, current repositories, official documentation and install path, but has not physically assembled it.